
Setting Up A Rain Chamber For Frogs in Your Backyard: Step-by-Step Guide
Creating a rain chamber for frogs in your backyard can be a rewarding project, allowing you to observe and care for these fascinating amphibians up close.
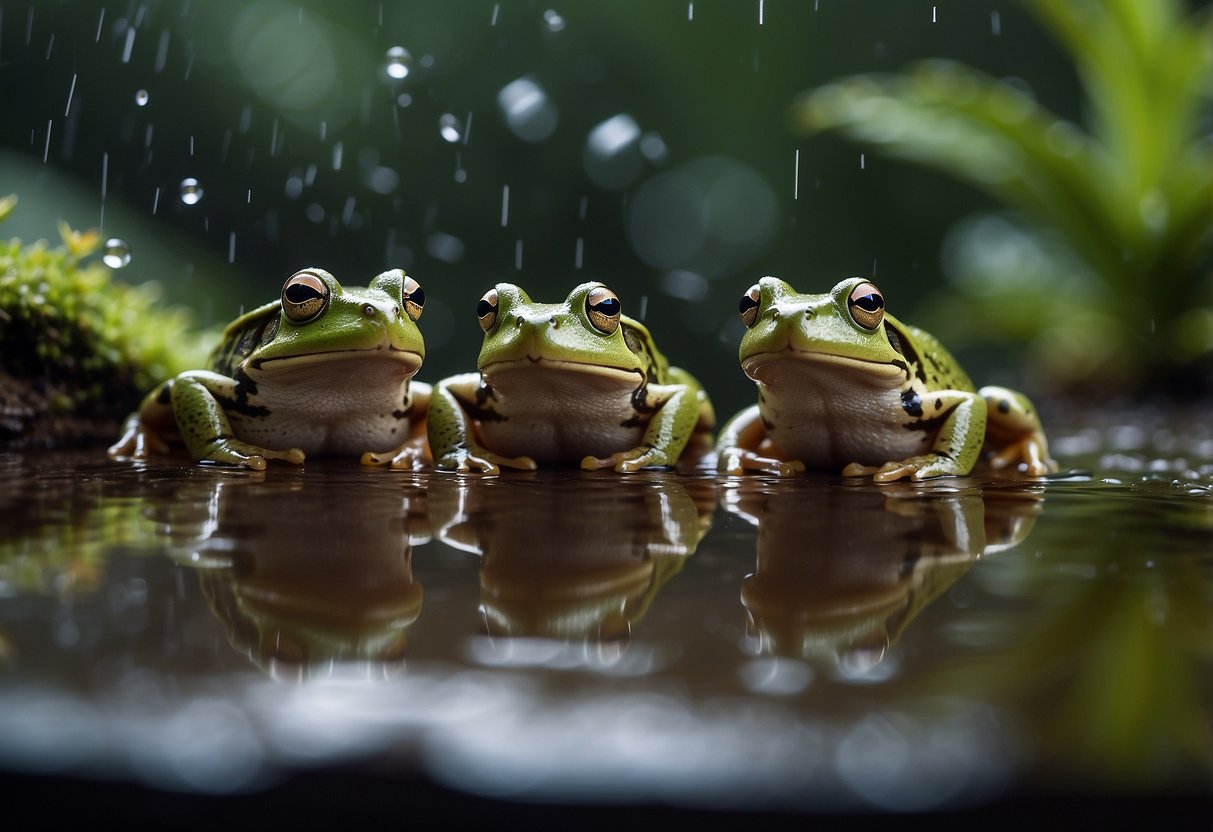
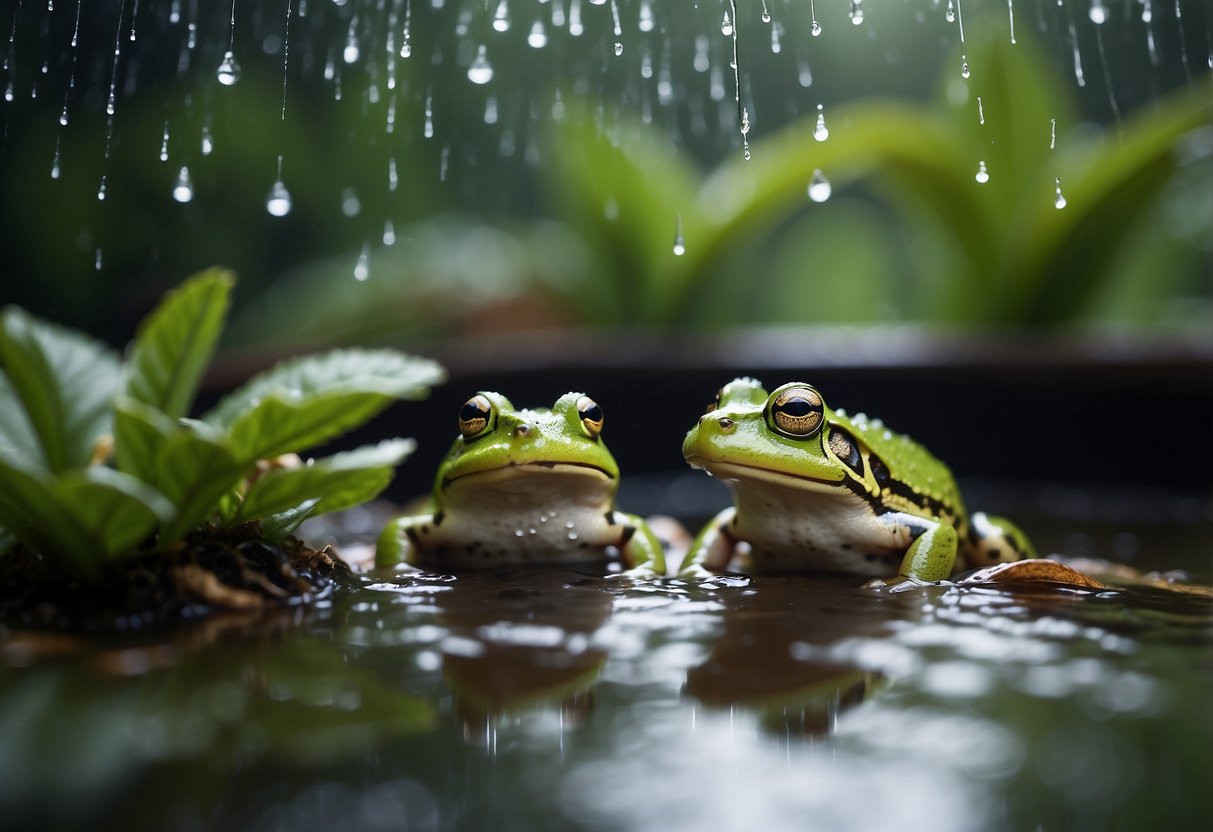
A rain chamber mimics the rainy season, stimulating breeding behaviors in frogs.
This setup can also provide a humidity-controlled environment that helps keep your frogs healthy.
NOTE: While many people choose to create a totally enclosed habitat, I recommend creating some openings to allow your frog and toad friends to enjoy the habitat at their leisure.

Building a rain chamber does not require advanced carpentry skills or expensive materials.
You will need a plastic tote, a canister filter, a heater, and some cable ties.
These items are easy to find and can be assembled with basic tools.
Watching your frogs thrive in their new habitat is truly satisfying.
The steps to setting up a rain chamber are straightforward. Begin with the structure, add the necessary equipment, and ensure proper conditions.
Once set up, your backyard rain chamber will become a safe and enriching space for your frogs to flourish.
Key Takeaways
- A rain chamber stimulates breeding behaviors in frogs.
- Constructing a rain chamber requires simple materials and basic tools.
- Proper care and maintenance ensure a thriving environment for your frogs.
Understanding a Rain Chamber
A rain chamber helps create an environment that simulates natural rainfall. This setup can promote breeding in amphibians and provides a controlled habitat for your frogs.
Benefits of a Rain Chamber
A rain chamber encourages natural breeding habits in frogs by mimicking their natural habitat. The rainfall stimulates mating behaviors and can help increase breeding success rates.
Additionally, a rain chamber helps maintain proper humidity levels. This is crucial for amphibians, which rely on moist environments for their skin health and hydration.
Another advantage is the controlled environment.
You can manage temperature, water quality, and other factors, reducing stress on your frogs and helping them thrive.
Required Conditions for Frogs
Set the rain chamber temperature between 76-78°F. This range supports a healthy environment for breeding.
Humidity should be kept consistently high.
Use a rain bar to dispense water into the chamber for several hours each day. Consider using PVC pipes to build the rain bar.
Ensure there’s a cool rest period of 1 to 3 months before starting the rain cycle. This mimics seasonal changes and encourages natural behaviors.
Place live plants, cork wood, and floating items in the chamber.
These elements provide shelter and reduce the risk of drowning. They also make the environment feel more natural and comfortable for your frogs.
Regularly clean and maintain the rain chamber to prevent mold and bacteria buildup.
Keep the water clean and fresh for the health of your amphibians.
Planning Your Rain Chamber
To set up a rain chamber for frogs in your backyard, you need to think about the location, size, and equipment.
Making careful choices in these areas will ensure a healthy and effective environment for your frogs.
Choosing the Right Location
Pick a spot in your backyard that is sheltered and not exposed to extreme weather. This helps protect the frogs from too much sun, wind, or rain.
Shade is important, so look for an area with some natural cover or add a tarp to create needed shade.
Think about how close the location is to a water source.
Having a nearby faucet or hose will make it easier to fill and maintain the water levels in the chamber.
Also, consider the noise; avoid busy or loud areas as frogs prefer quieter environments.
Sizing the Rain Chamber
The size of the rain chamber depends on the number and type of frogs you have.
For smaller species or fewer frogs, a chamber as small as 2 feet by 2 feet can work. Larger species or groups of frogs need more space, like a 4 feet by 4 feet chamber.
Make sure the chamber is tall enough for the frogs to climb and move around comfortably.
Aim for at least 2-3 feet in height. Bigger chambers are usually better because they provide more space and reduce stress for the frogs.
Materials and Equipment
You will need a few key items to build your rain chamber.
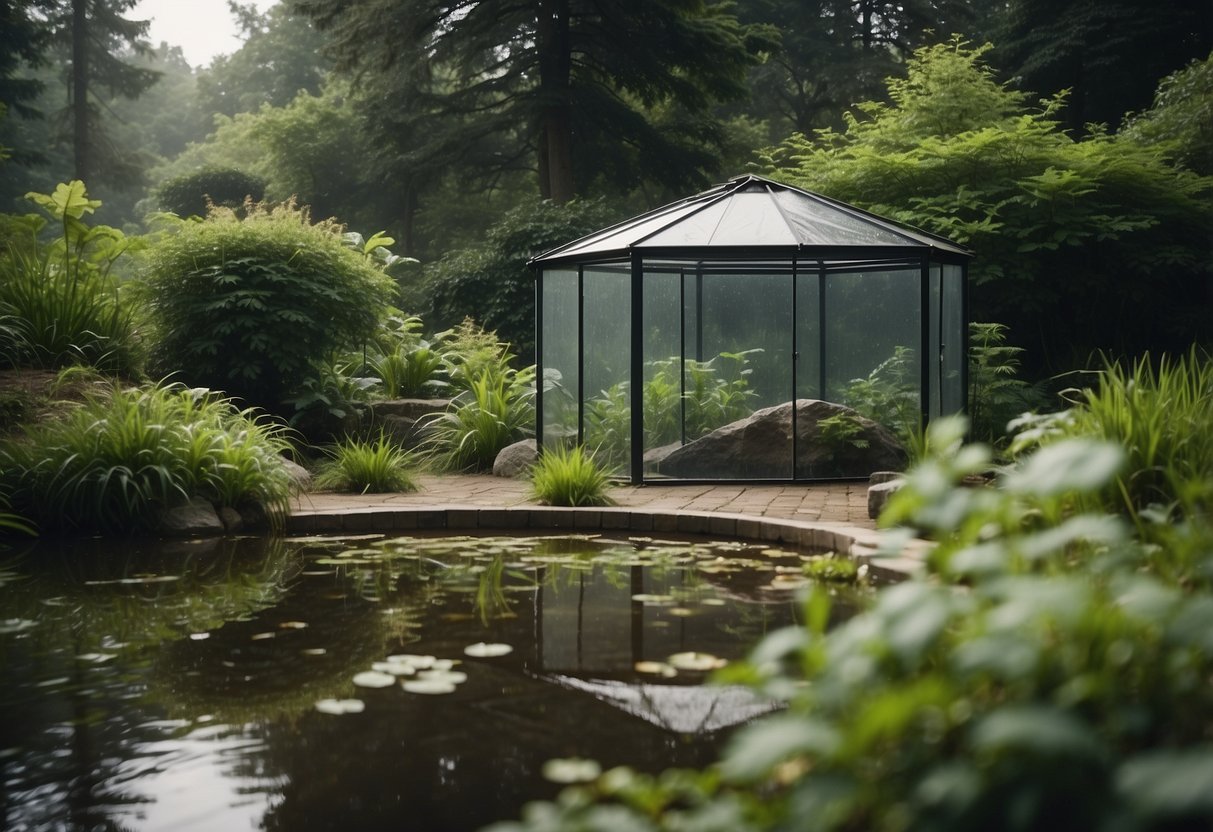
First, get a sturdy tank or container. Plastic storage bins, glass aquariums, or even custom-built wooden frames can work. Ensure it has a tight-fitting lid to prevent escapes.
Next, you need a rain system. This usually includes a water pump, tubing, and spray nozzles.
A submersible pump placed in a water reservoir will push water through the tubing to the nozzles, creating a rain effect.
For the substrate, use materials like coconut fiber or sphagnum moss to mimic the natural habitat.
Add plants, branches, and other decorations to create hiding spots and climbing areas.
Finally, a thermometer and hygrometer are essential to monitor temperature and humidity levels, ensuring a comfortable environment for your frogs.
Designing the Rain Chamber
To design a rain chamber for your frogs, it’s crucial to consider waterproofing, installing a rain system, and ensuring proper drainage and water recirculation.
Each step is vital for creating a functional and safe environment.
Waterproofing Considerations
When building a rain chamber, the first step is ensuring the entire setup is waterproof.
Use containers made from materials that can withstand water without leaking or degrading. Plastic totes, glass tanks, or acrylic enclosures work well.
Seal all seams and edges using aquarium-safe silicone. This prevents leaks and creates a durable barrier against water.
Pay special attention to any connections or joints, as these are common spots for leaks.
You might also consider adding a waterproof liner to the inside of your chamber.
This liner adds an extra layer of protection and is easy to replace if it gets damaged. Double-check for any cracks or weak points before active use.
Rain System Installation
The rain system is the heart of your rain chamber.
Start by installing a water pump that can deliver water to a spray bar or misting system at the top of the enclosure. Choose a pump that matches the size and water capacity of your chamber.
Attach a spray bar or misting nozzle to the pump. These elements create the rain effect needed for the frogs.
Ensure the spray bar covers the entire area to mimic natural rainfall patterns.
Secure all tubing and connections with cable ties or clips to prevent movement and leaks.
Use a timer to automate the rain cycle. This maintains consistent humidity levels and frees you from the need to manually turn the system on and off.
Drainage and Water Recirculation
Proper drainage is essential to prevent water from pooling at the bottom of the chamber.
Install a layer of pebbles or a false bottom to allow excess water to drain through. This creates a stable base for the frogs and plants.
Connect a drainage pipe from the bottom of the chamber to a water reservoir.
This allows you to easily remove and recirculate water, keeping it clean and fresh. Use a filter in the reservoir to remove impurities.
Set up the pump to draw water from the reservoir back to the spray bar or misting system. This creates a continuous cycle, ensuring that the water is always moving and remains aerated.
Check and maintain the system regularly to prevent clogs and contamination.
Constructing the Rain Chamber
Setting up a rain chamber involves assembling the structure, ensuring safety and accessibility, and conducting a final waterproof test.
Each step is crucial for creating an effective environment for your frogs.
Assembling the Structure
Start with a plastic tote or glass terrarium. Ensure it is large enough to accommodate your frogs.
Position a submersible water pump at the bottom. Attach flexible tubing to the pump’s outflow.
Use perforated tubing for delivering water. Secure the tubing along the top of the chamber using cable ties. This setup will simulate rain when the pump is turned on.
Place an aquarium heater in the water to maintain a temperature of 76-78°F. This is especially important for species like Red-Eyed Tree Frogs.
Ensuring Safety and Accessibility
Make sure the electrical components, like the water pump and heater, are waterproof and safe for outdoor use.
Use GFCI outlets to prevent electrical hazards. Secure all cables and wires to avoid any entanglement.
Include a screen or mesh top to ensure proper ventilation. This will help maintain humidity while allowing air circulation.
Ensure that you can easily access the chamber for maintenance, such as cleaning or adjusting components.
Place the chamber where it is easy to reach for feeding and monitoring the frogs.
Final Assembly and Waterproof Testing
After assembling, fill the chamber with water up to the level that covers the pump and heater.
Plug in the pump and heater, checking for proper operation.
Watch for leaks around seals and tubing connections. Make any necessary adjustments to ensure the chamber is watertight.
Test the perforated tubing to ensure water flows evenly, mimicking natural rainfall. Verify that the temperature remains stable.
The Care and Maintenance of Your Rain Chamber
Proper care and maintenance of your rain chamber are essential to ensure the health and breeding success of your frogs.
Routine cleaning, managing water quality, and checking the mechanisms are all critical tasks.
Routine Cleaning
Regularly clean the rain chamber to prevent the buildup of harmful bacteria and algae.
Empty the water and scrub the surfaces every week. Use a mixture of water and a mild vinegar solution to disinfect the chamber. Rinse thoroughly afterward.
Remove any organic debris, such as leaves or food particles, that may have accumulated.
This helps maintain a clean environment for your frogs and prevents any potential health issues.
Water Quality Management
Maintaining high-quality water is crucial for the health of your frogs.
Test the water regularly for pH, ammonia, nitrites, and nitrates. A balanced pH level (6.5-7.5) is ideal. Use water conditioners if necessary.
Change at least 20-30% of the water weekly to keep it fresh and reduce the buildup of waste.
Avoid using tap water directly, as it may contain chlorine or heavy metals. Instead, use dechlorinated or rainwater.
Ensuring Proper Function of Mechanisms
Check the submersible water pump and rain bar frequently to ensure they are working properly. Clean the pump’s filter to prevent clogs that can reduce water flow.
Inspect the flexible tubing for any blockages or leaks.
Secure all connections with cable ties.
Monitor the water temperature, ensuring it stays between 76-78°F. Maintaining the proper temperature is vital for the well-being of your frogs.
Regularly test and calibrate any timers or automation systems you use.
This ensures the rain chamber operates consistently and reliably, providing the necessary environment for your frogs to thrive.
Acclimatizing Frogs to the Rain Chamber
To help your frogs adjust to their new environment, you need to follow a careful introduction process and monitor their health closely. This ensures their well-being and promotes successful breeding.
Introduction Process
Start by slowly introducing your frogs to the rain chamber. Place them in a secure holding container inside the chamber for a brief period.
Steps to follow:
- Initial Placement: Begin with 15 minutes inside the chamber without any rain simulation.
- Incremental Time Increase: Gradually increase the exposure time by 10-15 minutes over the next few days.
- Rain Simulation: Begin the rain simulation only after your frogs are comfortable with the chamber itself. Start with light sprays and gradually move to longer rain periods.
Make sure the rain chamber’s temperature and humidity levels are similar to the frogs’ natural habitat.
Keep water in the chamber clean by using a filter and changing water regularly.
Monitoring Frog Health
Closely observe your frogs during the acclimation phase. Watch for any signs of stress or illness.
Key signs to monitor:
- Behavior Changes: Look for unusual lethargy, excessive hiding, or avoiding the water.
- Physical Signs: Check for changes in skin color, blemishes, or sores.
- Healthy Feeding: Ensure your frogs are eating regularly. A drop in appetite can indicate stress or health issues.
If you notice any concerning signs, remove the frog from the chamber and provide a quiet, comfortable environment.
Consult a vet if symptoms persist.
Troubleshooting and Solving Common Issues
One common issue is water leakage. Check all connections and seals to make sure nothing is loose or cracked.
Sometimes the water pump might not work. Make sure it’s plugged in and getting power.
If it’s still not working, clean the pump to remove any blockages.
Water temperature can also be a problem.
Use a heater to keep the water at 76-78°F and regularly check the temperature to maintain a stable environment. More about setting up a rain chamber.
Rain not falling evenly: If the perforated tubing isn’t distributing water evenly, ensure the holes are not blocked.
Adjust the positioning of the tubing on the aquarium cover.
Flooded setup: To prevent flooding, make sure you have a proper drainage system.
You can place a substrate at the bottom to absorb excess water.
Fungal infections in frogs: Avoid this by controlling humidity.
High humidity can lead to fungal growth, so make sure the chamber is well-ventilated.
IssueSolutionWater leakageCheck and tighten connectionsPump not workingEnsure power supply and clean pumpUneven water distributionClear tubing holes, adjust positioningTemperature fluctuationUse and monitor heater frequently
Enhancing Your Rain Chamber
Enhancing your rain chamber can greatly improve its effectiveness and longevity. Focus on incorporating reliable technological upgrades and diversifying the ecosystem within the chamber.
Technological Upgrades
Upgrading the technology in your rain chamber can improve its efficiency.
Start by installing a submersible water pump to ensure a consistent water flow.
Attach perforated flexible tubing to the pump’s outflow; secure it with cable ties to create a rain-like effect.
For temperature control, place a heater in the base, set to 76-78°F, but do not plug it in until all components are in place.
Use timers for the pump and heater to mimic natural rain cycles, which encourage breeding.
Automated systems for monitoring water quality can also be beneficial.
Consistent pH levels and clean water are crucial for the health of your frogs.
Introducing Variety in the Ecosystem
Introducing a variety of elements in your rain chamber creates a more natural environment.
Start by adding live plants such as ferns and mosses that thrive in moist conditions. These plants help maintain humidity and provide hiding spots for your frogs.
Consider incorporating different substrates like leaf litter or coconut fiber at the bottom of the chamber.
This not only replicates a natural forest floor but also supports microbial life, which is essential for a balanced ecosystem.
Adding small invertebrates like springtails or isopods can help break down waste, keeping the chamber clean.
Ensure there are varied perching and climbing structures using branches or vines, giving your frogs plenty of space to move and explore.
A diverse ecosystem with multiple plant types and small creatures will make the rain chamber more stimulating for frogs, encouraging natural behaviors.
Frequently Asked Questions
Creating a rain chamber for frogs in your backyard requires planning and knowledge. The questions below cover materials, environmental conditions, and best practices for a successful setup.
What materials are necessary to create a suitable habitat for frogs outdoors?
To create a suitable frog habitat, you will need a pond or a water feature, plants, rocks, and hiding spots like logs or stones. You can read more about setting up a frog habitat in your yard here.
What specific environmental conditions must be maintained in a rain chamber for frog health and breeding?
Maintain a wet and humid environment that simulates seasonal rains.
Important conditions include consistent water levels and proper drainage to prevent flooding. Learn how to build a rain chamber that keeps frogs healthy here.
How can I simulate rainfall within a frog enclosure in my garden?
Use sprinklers or misters to create a rain effect.
These systems can be set on timers to replicate natural rain patterns. For a detailed guide on making a rain chamber, visit this site.
What are the best practices for maintaining humidity in a backyard frog habitat?
To maintain humidity, regularly mist the enclosure and provide plenty of water features.
Adding moist substrates, like coconut fiber or sphagnum moss, can also help keep humidity levels high. Check out some effective tips here.
Can you recommend plants and substrates that are ideal for a backyard frog rain chamber?
Use native plants, ferns, and mosses that thrive in wet conditions.
For substrates, options like coconut fiber, sphagnum moss, and leaf litter are ideal as they hold moisture well and mimic a natural habitat.
What are the common health concerns to watch for in frogs living in a homemade rain chamber?
Keep an eye out for fungal infections, respiratory issues, and skin diseases caused by improper humidity and cleanliness.
Regularly clean the enclosure and monitor water quality to prevent these issues.
For more about potential health risks, click here.